
In early 2025, I decided to take a step that had been on my mind for a while — becoming an Unreal Authorized Instructor (UAI). As someone who has been passionate about Unreal Engine for years, working as a 3D generalist and C++ developer by day and building my own indie projects at night, this felt like the perfect way to blend my professional skills, personal passion, and love for teaching.
What follows is the story of how I went from submitting my application to finally receiving my official UAI badge from Epic Games — a journey that tested my skills, patience, and even my video editing stamina.
Step 1 – The First Green Light
On April 1, I got the email every applicant hopes for:
“Congratulations, your UAI application has been approved to move forward!”
I had two weeks to complete the “Which Path is Right for Me?” course on Unreal Academy and choose one of four specializations: World Building, Technical Art, Looking Development, or Game Development. Naturally, I chose Game Development, the path that best reflected my expertise and passion. It was the first real step on the road to certification.
Step 2 – Passing the Exam
By April 11, I was invited to take the exam — 60 minutes, multiple choice, with three attempts allowed. I reached out to the training team for advice, and they directed me to the UAI Study Guide, which I studied thoroughly. When I finally took the test, I passed — and with that, a huge weight was lifted off my shoulders. The dream was still alive, and I was one step closer to the badge.
Step 3 – Learning to Design & Deliver
The next requirement was to complete two short courses:
- Designing On Demand Learning
- Delivering On Demand Learning
These focused on creating high-quality educational content, structuring lessons effectively, and engaging learners online. They were practical, concise, and laid the groundwork for the final challenge.
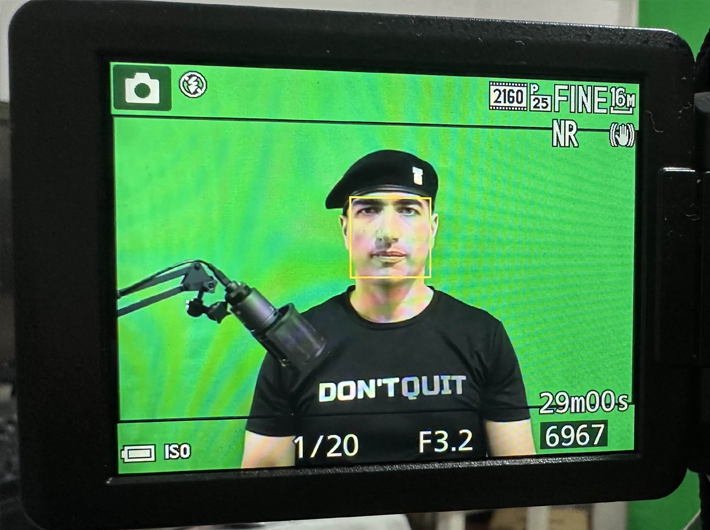
Step 4 – The Final Challenge: Instructional Skills Demo
This was the make-or-break moment: creating a 15–30 minute Unreal Engine tutorial that demonstrated my teaching skills.
The requirements were clear:
- Show my screen as the main video feed.
- Include my face in a smaller video window.
- Deliver clear audio.
- Add English subtitles if the video was not in English.
I decided to record the entire voice-over in Arabic, my native language — but with English subtitles for accessibility.
My Production Setup
To make the video as professional as possible, I used:
- Nikon COOLPIX P1000 Superzoom Digital Camera | 125x Optical Zoom with Image Stabilization, 16 MP, 4K Ultra HD Video, Wi-Fi Connectivity, RAW Format, Rotating LCD Screen (Black)
- Audio-Technica AT2020USB+ Cardioid Condenser USB Microphone with Built-In Headphone Jack & Volume Control
- Pop Filter, PEMOTech [Upgraded Three Layers] — Metal Mesh, Foam, and Etamine Layer Microphone Windscreen Cover
- Neewer Video Conference Light Kit, 3-Pack Dimmable 5600K USB LED Video Lights with Desktop Tripod Stand and Color Filters
- EMART Green Screen Backdrop, 6 x 9 ft Muslin Cloth Curtain with 4 Clips
- Mlici 16 Pieces Clear Sign Clips, Rotatable Pop Clip Sign Holders for Retail & Display

But beyond the gear, what truly made this possible was the support of my family. My wife, despite being sick at the time, took care of our daughter, acted as a director behind the camera, and encouraged me to stay focused and finish strong — this achievement is as much hers as it is mine. My father also played a huge role, providing me with the camera and a stage light (which I ended up not using in production), along with his constant encouragement, check-ins, and care throughout this demanding process.
Step 5 – The Subtitle Hurdle
When I submitted my demo, I thought I had nailed it — until I got an email saying my video lacked English subtitles. I had included them as a separate .srt file, but the requirement was for burned-in (hardcoded) subtitles.
That meant re-rendering the entire video with the subtitles baked in. I redid it and resubmitted, this time meeting all requirements.
Step 6 – The Big Moment
On July 22, I received the email I’d been working toward for months:
“You have been qualified as an official Unreal Authorized Instructor!”
Attached was my evaluation scorecard and instructions to accept the ELT Partner Terms and Conditions. Shortly after, my 2025 UAI badge arrived via Accredible.
Step 7 – Joining the Global Community
After confirming the terms, I was invited to the private LinkedIn group for Unreal Authorized Instructors, giving me access to:
- Exclusive partner training materials.
- Recordings from industry summits.
- Over 60 ready-made Unreal Engine courses I could adapt for my learners.
It felt like joining a global family of educators who share the same mission: helping others create something Unreal.
Reflections & Advice
Looking back, this process taught me a few key lessons:
- Preparation matters — the Study Guide is your friend.
- Production quality counts — clear visuals, audio, and subtitles are essential.
- Follow the technical requirements exactly — even small details like subtitle format can delay your review.
- Don’t do it alone — support from family or friends can be the difference between giving up and pushing through.
Conclusion
Becoming a 2025 Unreal Authorized Instructor wasn’t just about passing exams or submitting a polished video. It was about proving my ability to teach Unreal Engine effectively and connecting with a global network of passionate educators.
To anyone considering the UAI path: it’s worth it. Not just for the badge, but for the growth, connections, and the chance to inspire others to create something epic.
And to my wife and father — thank you. This badge has my name on it, but it belongs to all of us.
💡 Excellent work on this ultimate guide! every paragraph is packed with value. It’s obvious a lot of research and love went into this piece
Keep up the great work
Your blog is a testament to your passion for your subject matter. Your enthusiasm is infectious, and it’s clear that you put your heart and soul into every post. Keep up the fantastic work!
Your blog is a constant source of inspiration for me. Your passion for your subject matter shines through in every post, and it’s clear that you genuinely care about making a positive impact on your readers.
Really insightful post
Really insightful post — Your article is very clearly written, i enjoyed reading it, can i ask you a question?
Interesting read! Understanding player psychology is key
Really insightful post
Really great read. Thank you
this is very interesting to read, i like your work
Great article, i really enjoy reading it, i hope you post more, keep up the good wok , is gona come follow you for more , nice reading it.
I?m not positive where you’re getting your info, but good topic. I must spend some time learning much more or figuring out more. Thank you for fantastic information I used to be looking for this info for my mission.
As I web site possessor I believe the content material here is rattling fantastic , appreciate it for your efforts. You should keep it up forever! Best of luck.
I have read some good stuff here. Certainly worth bookmarking for revisiting. I surprise how much effort you put to create such a excellent informative website.
This really answered my problem, thanks!
I’m impressed by the quality of this content! The author has obviously put a great amount of effort into investigating and arranging the information. It’s exciting to come across an article that not only gives useful information but also keeps the readers engaged from start to finish. Great job to her for producing such a brilliant work!
Hey there, You’ve done an excellent job. I will certainly digg it and personally suggest to my friends. I’m confident they’ll be benefited from this website.
Hello there, I discovered your website via Google whilst searching for a similar matter, your site got here up, it appears great. I’ve bookmarked it in my google bookmarks.
Great article, i really enjoy reading it, i hope you post more, keep up the good wok , is gona come follow you for more , nice reading it.
Thanks for your fascinating article.
Thank you for the auspicious writeup. It in fact used to be a enjoyment account it. Look advanced to far added agreeable from you! By the way, how can we be in contact?
Excellent site. Plenty of useful info here. I?m sending it to several friends ans also sharing in delicious. And naturally, thanks for your sweat!
Greetings! I’ve been following your site for some time now and finally got the bravery to go ahead and give you a shout out from Lubbock Texas! Just wanted to tell you keep up the fantastic job!
Thanks for the tips you have discussed here.
Excellent goods from you, man. I’ve understand your stuff previous to and you are just extremely excellent. I actually like what you’ve acquired here, certainly like what you’re saying and the way in which you say it. You make it enjoyable and you still care for to keep it wise. I can not wait to read much more from you. This is actually a great web site.